The Loft…a work in progress

The loft is rebuilt as far as we can take it without rebuilding the north and south sides of the house.  This is a major structural remodel that we are starting right now.  But until those sides of the house are completely build, the loft will be in progress.

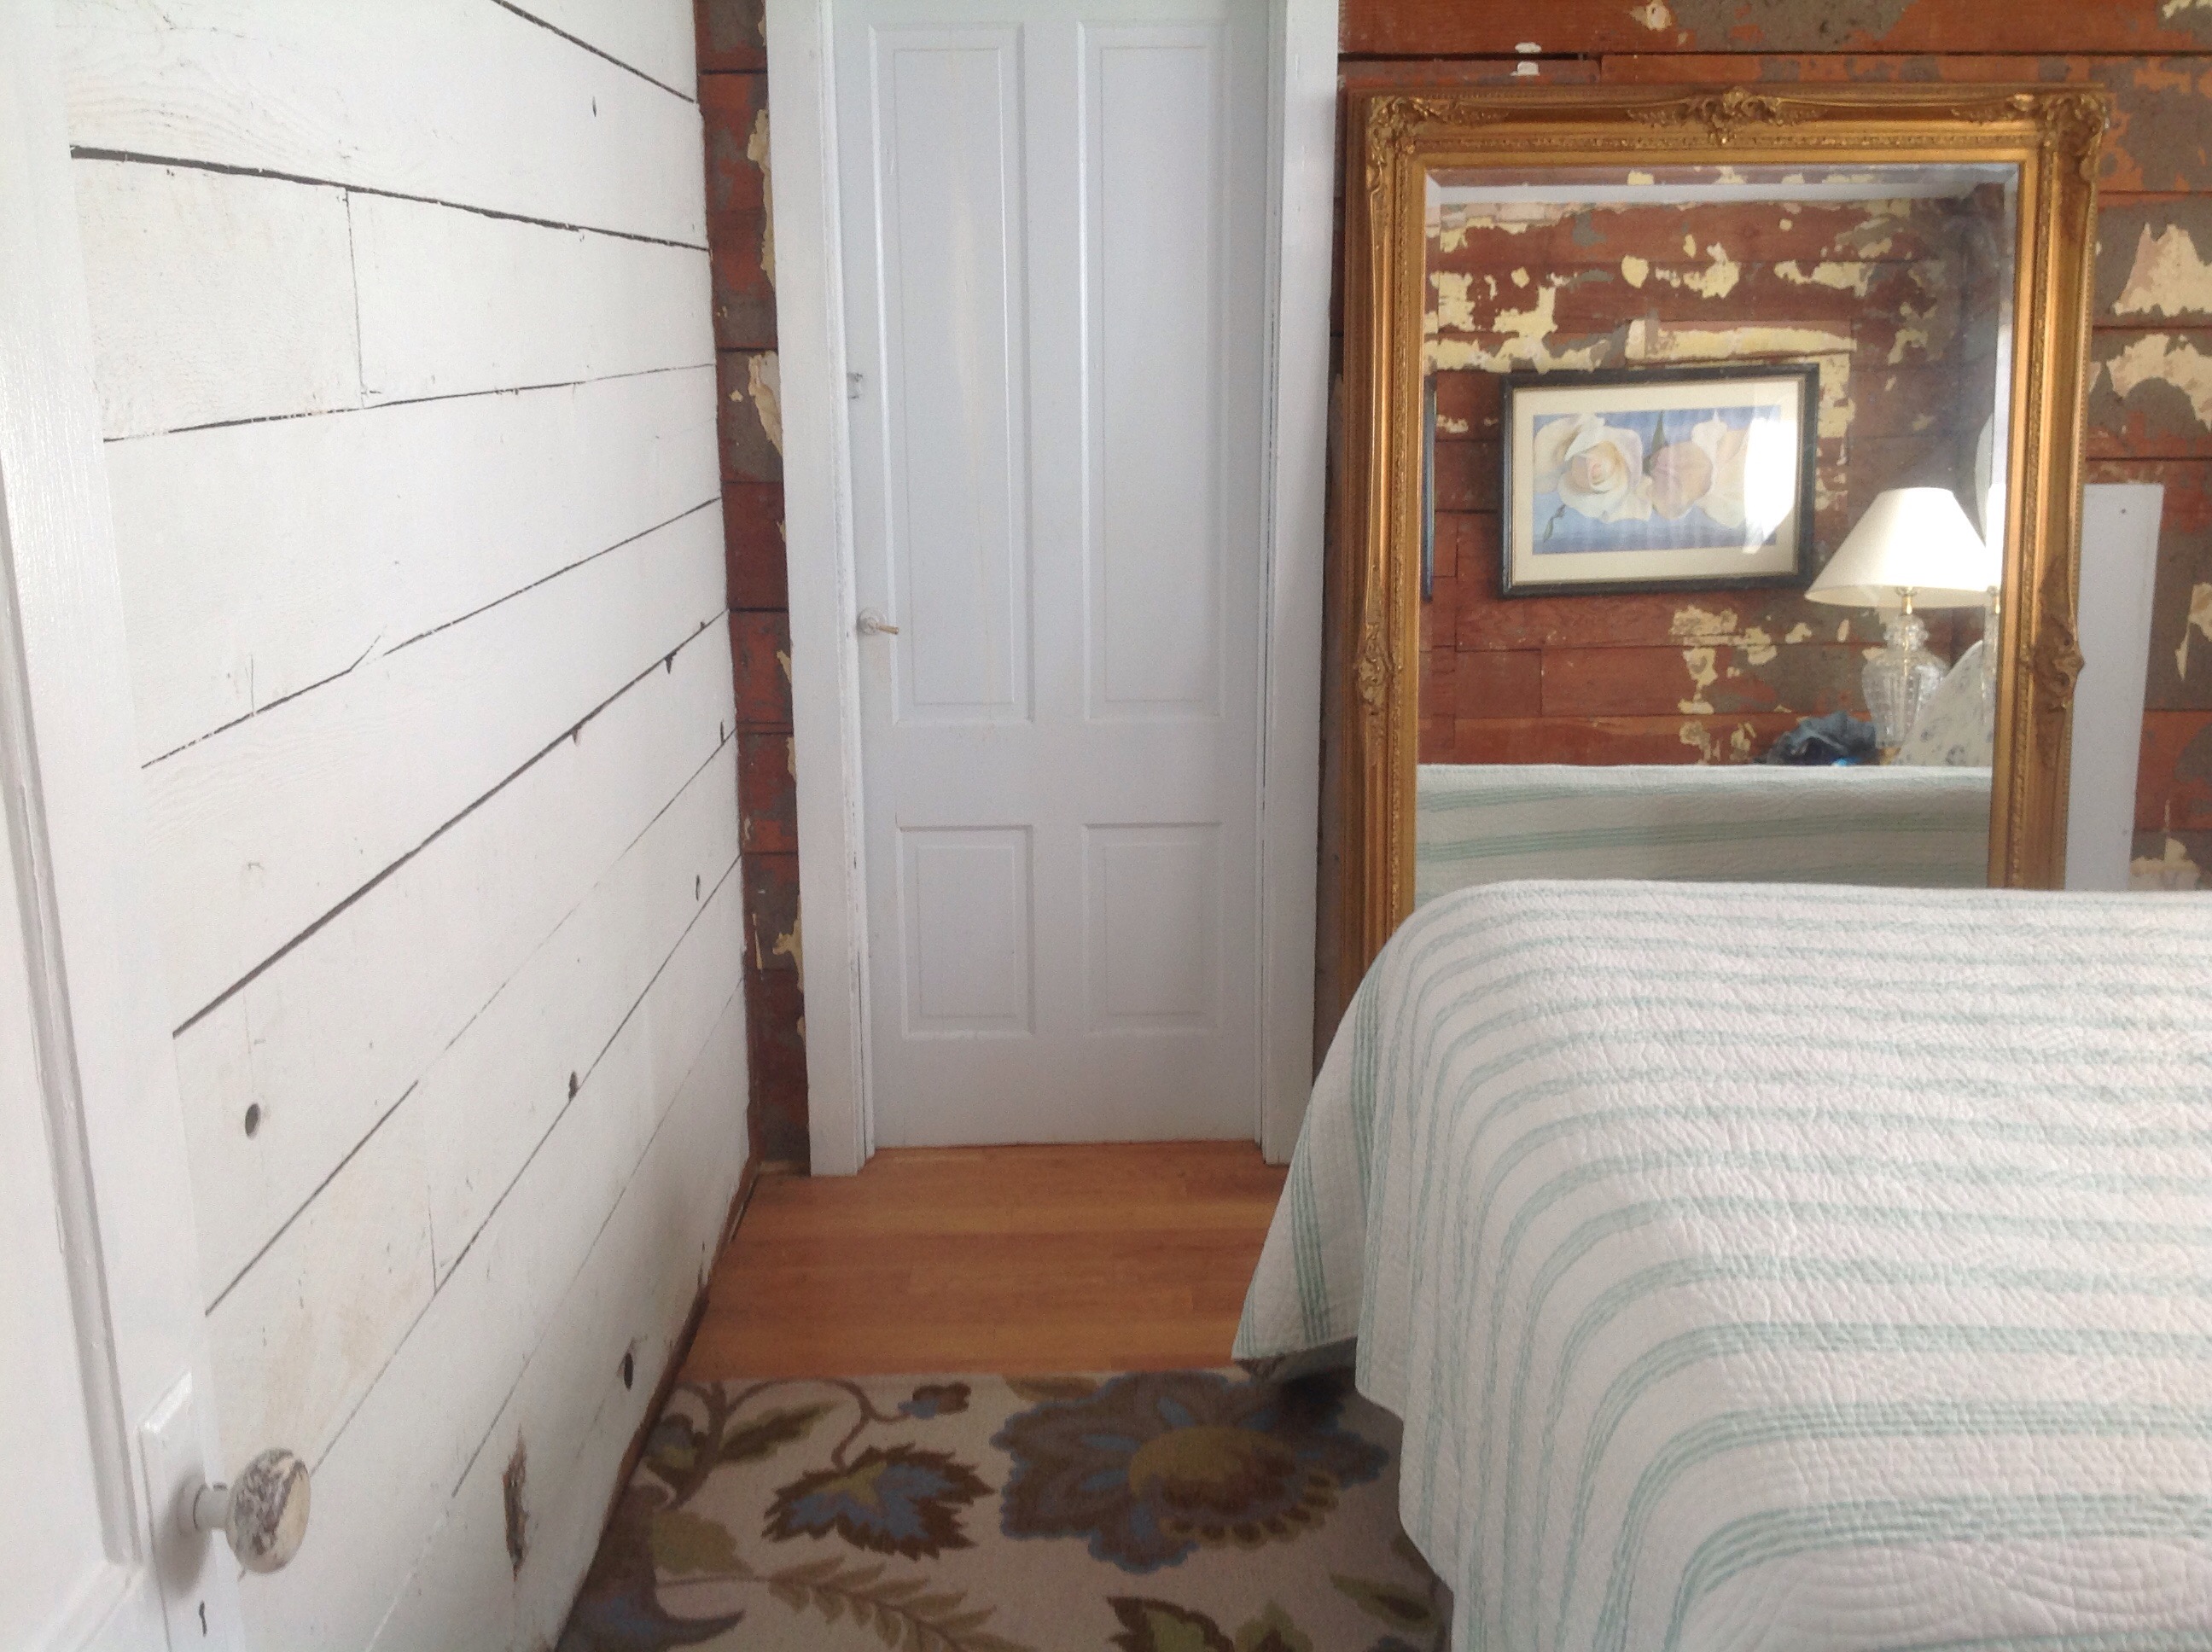
With that said, we were able to remove the drop down 1950s ceiling and replace it with pine tongue and groove vaulted ceiling.  I love how open it is and the Scandinavian feel of the pine, white shiplap and black painted floor.  We had originally planned on leaving the shiplap natural cedar but it looked too much like a log cabin.  Painting that shiplap white has taken me months but worth the effort.

We are excited to finish the loft but enjoy our progress so far.  Considering it was really scary when we bought the house, it is an amazing transformation to a lovely master bedroom and sitting area.

How to rebuild an old house

When your 102 year old beach house is made entirely of 102 year old wood planks and not much else you must help her out!  Most of the houses in our tiny beach community were built for 3 seasons without heat or insulation.  The houses were summer homes built at the turn of the century for Portland, Oregon families to escape the heat.    But we want to leave here full time and be able to stay warm and comfortable year round.

So my clever husband created a plan to not only remove the horrible drop down ceiling in our loft but to insulate it with foam panels and create a new ceiling with tongue and groove pine.  It was a tremendous amount of work that took about 6 months of weekends but definitely worth the effort both for the aesthetics and heat efficiency.


Loft Living

I have never lived in a space with an open loft. When we decided to vault the ceiling and tear down the walls in our beach house last year, I honestly didn’t know what to expect.   The openness and high ceiling are great but the knee walls and wide expanse create a design challenge I am working on over and over in my  mind.  Where do I hang pictures? Do I leave the floor open or add a coffee table?  Nice problems to have but lets look at where we started…

These photos show how the loft looked before- cozy but all white and very low ceiling.  Next are the reno photos showing the 100 year old beams and the exposed brick on the chimney.  Also missing is any insulation! Over the past year we have renovated the loft by adding insuluation, new windows and walls.

One thing I have learned is that when you open up the walls of an old house you never really know what to expect… more to come on how we transformed this space into a livable loft!

Refresh

My blog has taken a major backseat to remodeling 2 old houses at once.  Not sure what we were thinking 2 years ago when we started this journey but have we ever learned a lot!  I always tell people who ask about living in and remodeling an old house that the house reveals itself to you along the way if you are willing to do the hard work of bringing it back to life.

Now that we have completed the tiny cottage and are selling it, we plan to focus full time on our beach house and restoring it.  I want to reflect on some of the projects that brought the tiny house back to life and look forward to sharing our journey towards finally living in our beach house full time after a 14 year wait!

A Hint of Mint

Working to pull a small house together is a challenge for space and storage but I have found that using one color scheme really helps make the space cohesive.  Our little cottage seemed dark and dreary so I wanted to white wash everything with my favorite Behr High Hide White paint.  Once I got the living room painted, it seemed like it needed a boost so I went with my original plan to paint the walls with Sherwin Williams “Rainwashed”, a soft blue green that has guided the other color choices through out the cottage.  

Inspirations


My “Rainwashed” Cottage


Cottage Kitchen goes Industrial

We have struggled with designing a kitchen out of a small space that lacked cabinetry and any appliances on one side.  Given the need to buy all new cabinets, appliances and countertops, I tried find a solution that provided lots of counter space, reasonable cost, a design element and fit in a small space.  Plus we wanted to create a coffee/breakfast bar within the space.  This was one of the toughest design challenges we have faced in our renovation projects.  

I kept seeing islands that met the criteria we wanted so I decided to look at the open space like an kitchen island. I googled 48 inch tables and found that restaurant grade stainless work tables might work.  I finally found the site “Webrestaurant.com” which had open tables for our coffe table and shelfed tables that would be a work space on the other side of the stove.  With shipping, the tables cost $500.  

We are thrilled with the solution- plus they came with specific measurements so no surprises and had countertops built in.  The industrial restaurant grade stainless give a modern, unexpected pop to the cottage kitchen and solved all our design needs.  Now just have to get gas stove hooked up! 


Top Tips for Tiny Home Living

We have been living and remodeling a 672 square foot home for 2 months.  Kind of feels like an episode of “Property Brothers” without the big reveal.  Here are some of the things I’ve learned so far…

1. Measure everything and keep those numbers on your phone along with supply and to do lists.

2. Carry a tape measure with you.

3. Be flexible, old tiny old homes have surprises (some good, some not so much) and be willing to adjust paint, design and furniture choices accordingly.

4.  Don’t be set with one use for furniture, cabinets, shelves- try to mind multiple uses for everything.

5.  Keep lots of paper towels, scrub sponges and other cleaning supplies readily available so you can clean as you go. 

6.  We have a canvas tool bag filled with hammer, nails, screws, glue and other supplies to do projects and keep it handy.

7.  Find a place for EVERYTHING and put it back as soon as you are done with it.

8. Don’t think small when it comes to a tiny home- we kept our 50 inch flat screen- we just attached it to the wall and kept a large mirror and a painting to help make ceilings taller. 

9.  Buy appliances and furniture that are size appropriate for your space- we wanted a full size couch but are now looking for a loveseat instead.

10.  Living in a tiny house makes you think about what  


 you really need and want in your home- the tiny house helps you edit your life in a very positive way.

Tiny house, tiny bathroom

A simple fact of tiny homes is they have small bathrooms.  Luckily our new cottage has a big original cast iron tub but the old sink looked like something from a nasty reststop bathroom.  It had to go.  But what to replace it with? We desperately needed storage but I wanted a pedestal sink to save on space.  My dear husband wanted an IKEA prebuild cabinet with sink to match.  Price point was $250-400 for pedestal and $450 for complete cabinet, sink and faucet.  

We have not had good luck with IKEA cabinets in past so I was very hesitant.  Once we looked more closely at the quality of the drawers and faucets, I was sold.  Now that we have lived with it for a couple of weeks, it is a winner on style and practicality.

The bathroom is in progress as we need to do some structural floor work then rebuild built in shelving as old cabinets were water stained and very smelly so they were ripped out along with the hideous 1970s medicine cabinet.  We plan to replace the shower surround with galvanized sheet metal and redo the bead board wall behind the sink and install a ️square mirror we found at IKEA for $12.  I’m kind  of loving IKEA again!

Bathroom before 


Bathroom in progress with IKEA cabinet  


Small Kitchen, Big Ideas

Both of our tiny houses have galley style kitchens.  I cook almost all of our meals so I like to create a space that is highly efficient and pleasant to spend time in.  My frugal ways keeps me from wanting to spend large sums on trendy or name brand appliances – I have cooked on almost everything from a open fire to a cheap hot plate so I can make any stove, fridge and sink combo work.  We have purchase GE Artistry fridge and stove which are small in size and vintage in design- so far we love the look and function.

One side of our tiny kitchen was left blank.  I learned this is typical of old houses because it usually was too expensive to put cabinets throughout.  I am going to open shelving on the blank side made from salvaged old growth Doug Fir shelves salvaged from Restore for $10 and some cool black brackets from Astoria Vintage Hardware.  This is a kitchen in progress…more as it is put together! 

Before we bought house, kitchen as is

Kitchen in progress


Shiplap Surprises

A tiny house has a tiny bedroom.  Luckily we knew we could fit our queen bed in the cottage’s tiny bedroom if we took out an old, poorly built closet.  Once we started taking it down, the walls behind it were covered in 3 different types of 1930s wallpaper.  Underneath the wallpaper was Douglas fir shiplap.  I have taken wallpaper done before but not off of raw wood.  It is extremely time consuming but I think the final result will be worth it as I’ve got one wall removed and painted white.  This is definitely a work in progress! 

Bedroom before with old walls and closet


Shiplap bedroom walls revealed and being restored with wallpaper removal and white paint